Contents
- Webinar playback
- What are AI sources and source grounding?
- AI source libraries
- Grid AI settings
- Element and stage gate AI settings
- Using AI sources in elements and stage gates
Webinar Playback
Source Grounding
Using Source Grounding (also known as RAG ‘retrieval augmented generation’) your Method Grid AI Assistant can now be tailored to use your own in-house knowledge (AI sources) when generating content in Method Grid. To ensure your knowledge is secure and organised, you can group your AI sources into access controlled libraries, and then assign these libraries to your grids for use by the AI Assistant where you need them.
Source Grounding, also called ‘retrieval augmented generation’ or RAG, is a method used to give an AI model – specifically a Large Language Model (LLM) – extra context about you, your organisation or your project, so that it can answer questions and generate content that is more relevant to you. Source Grounding is a way of providing an LLM with extra information that wasn’t in its training data, learn more …
Managing AI Sources
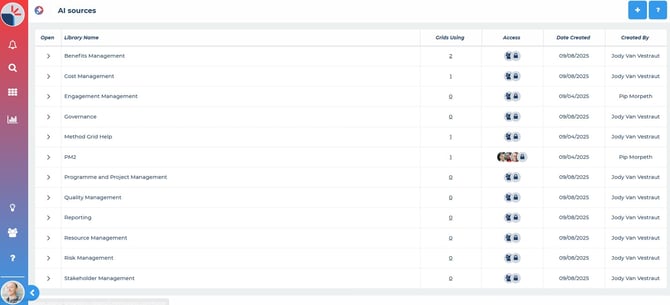
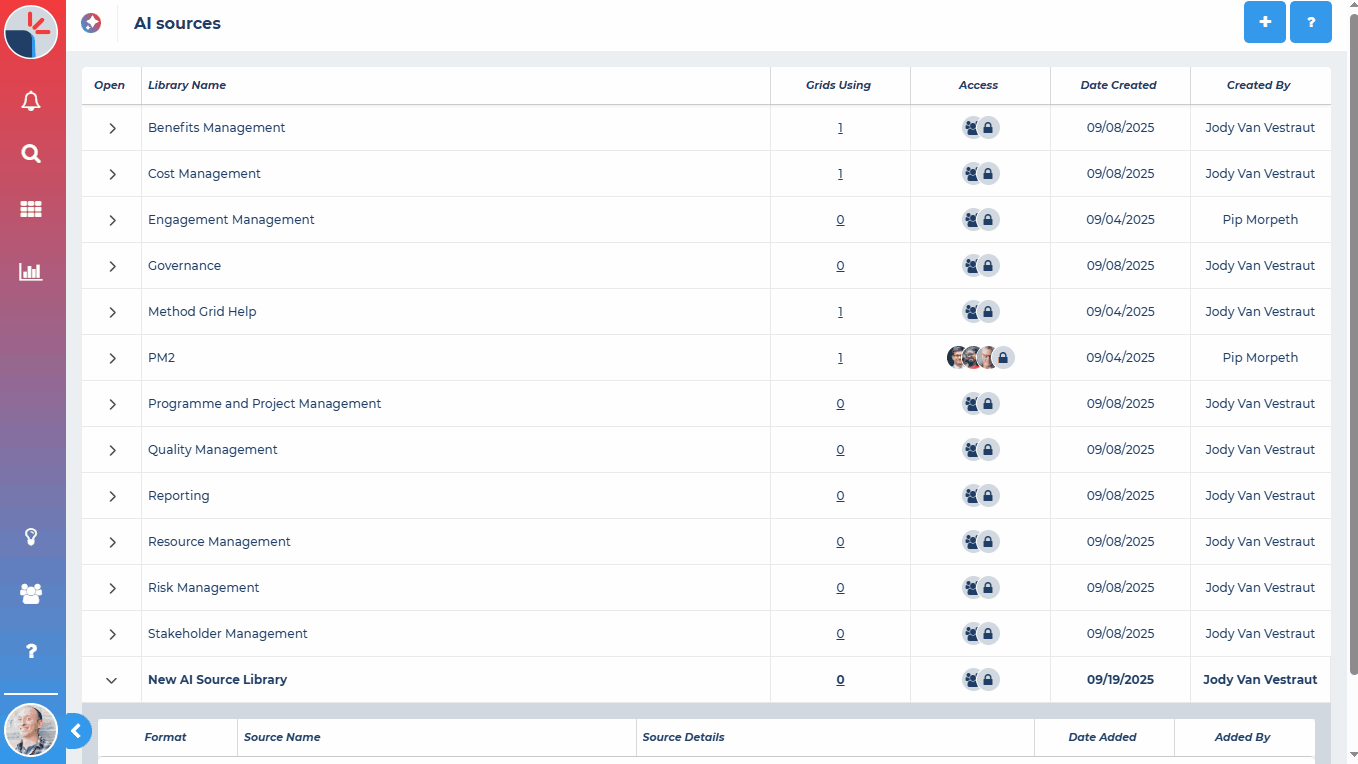
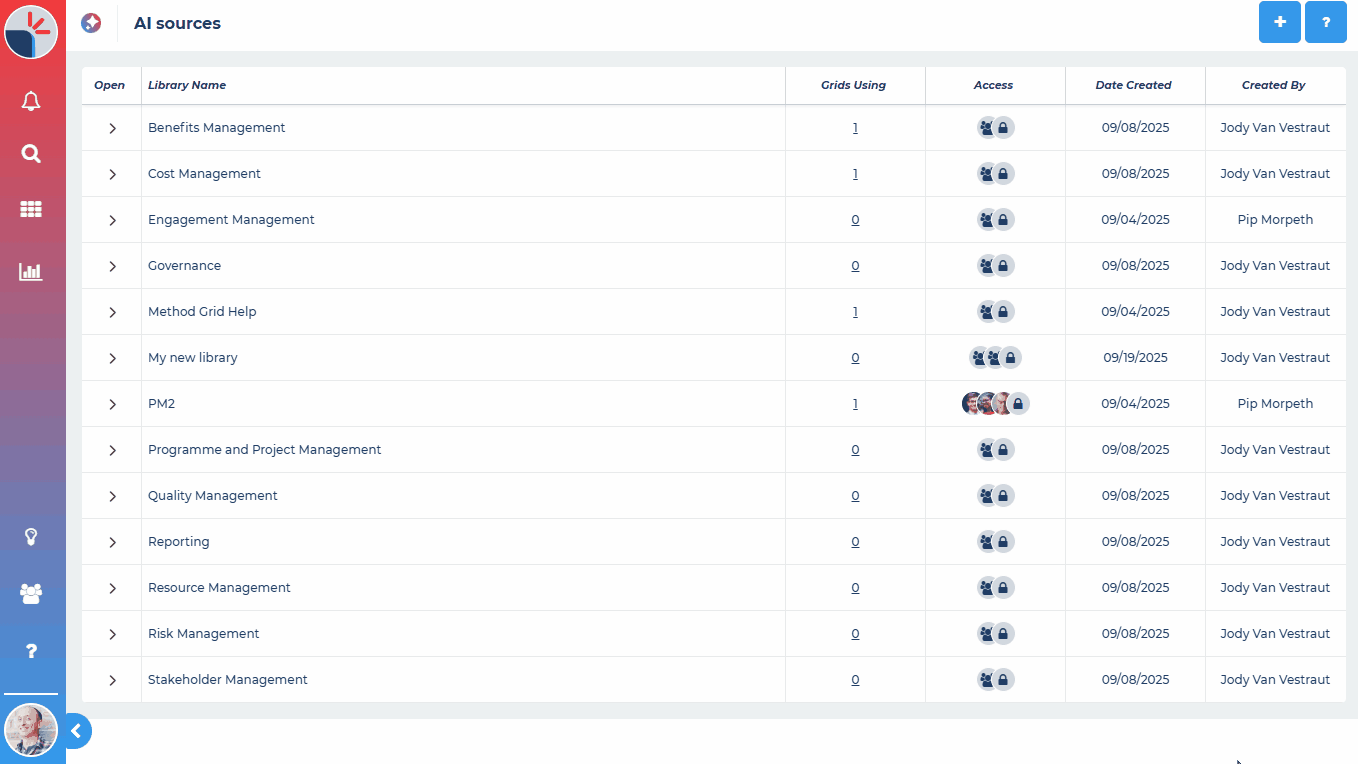
AI sources can be either files you upload or webpages. These files and webpages are stored and organised into source libraries. Think of these libraries as the folders in which your AI sources are stored and organised, much like the folders on your PC or SharePoint. You can then give members of your account access to these folders so that they can manage, view, add, edit and delete sources.
Creating Source Libraries
To start using AI sources, you first need to create your AI source libraries. Only architect (admin) level members can create source libraries. To create and manage your source libraries:
- In the left hand navigation click on the light bulb icon
- Select AI sources
- Click the plus button at the top of the page to create a new source library
- Configure who should have access to this library
- Your new source library will appear at the bottom of the list of libraries
Naming Source Libraries
To name your source libraries you must have at least edit access to the library, you can then double click on the library name to edit it.
Adding Sources to Libraries
To manage and add sources in a library, you must have at least edit access to the library. You can add two types of source for the AI to use:
- Upload files – these can be PDFs, Word documents or Text files (.pdf, .docx or .txt file extensions)
- Web pages – these must be publicly accessible web pages that allow system access
To add a new source:
- Expand the source library into which you want to add a new source
- Click the plus button
- Select either file from computer or web page as desired and then either
- Select the file from your computer or
- copy/paste the web page URL, give it a title and click the tick icon
- The source will then appear in the sources list for that library

To name a source:
- Double click on the source name to edit it

To delete a source:
- Right click on the source and select delete.

You can also use the standard keyboard shortcuts, shift key + mouse click (to select adjacent cells) or ctrl key + mouse click (to select non-adjacent cells), to select multiple sources at once and then right click to delete all the selected sources.
Note: deleting a source from a library will permanently delete it, this cannot be undone.
To view a source:
- Click on the source details link to either download the source file or open the source web page
Managing Access to Source Libraries
You can give your account members access to your AI source libraries in the same way that you manage access to folders and grids. There are 3 levels of access:
- View = the member can view the source library and the sources within it
- Edit = the member can view, edit and delete the source library and the sources within it
- Manage = the member can manage access to the source library and view, edit and delete the source library and the sources within it
Members with view, edit or manage access to a source library can also assign that library for use in any grids to which they have manage access.
To manage access to a source library, click the library’s padlock icon. To manage access you must have at least manage access to the library.
Note: External account members do not have access to these source libraries, they only see AI sources within grids to which they have access.

See the Grids Using Source Libraries
You can see the grids to which a source library has been assigned by clicking on the grids using number for the library. This will open a list of all the grids currently using that library.

Deleting Source Libraries
To delete source libraries you must have at least edit access to the library, you can then right click on the library and select delete. You can also use the standard keyboard shortcuts, shift key + mouse click (to select adjacent cells) or ctrl key + mouse click (to select non-adjacent cells), to select multiple libraries at once and then right click to delete all the selected libraries.
Note: deleting a library will permanently delete it and all the sources within it, this cannot be undone.
Grid AI Settings
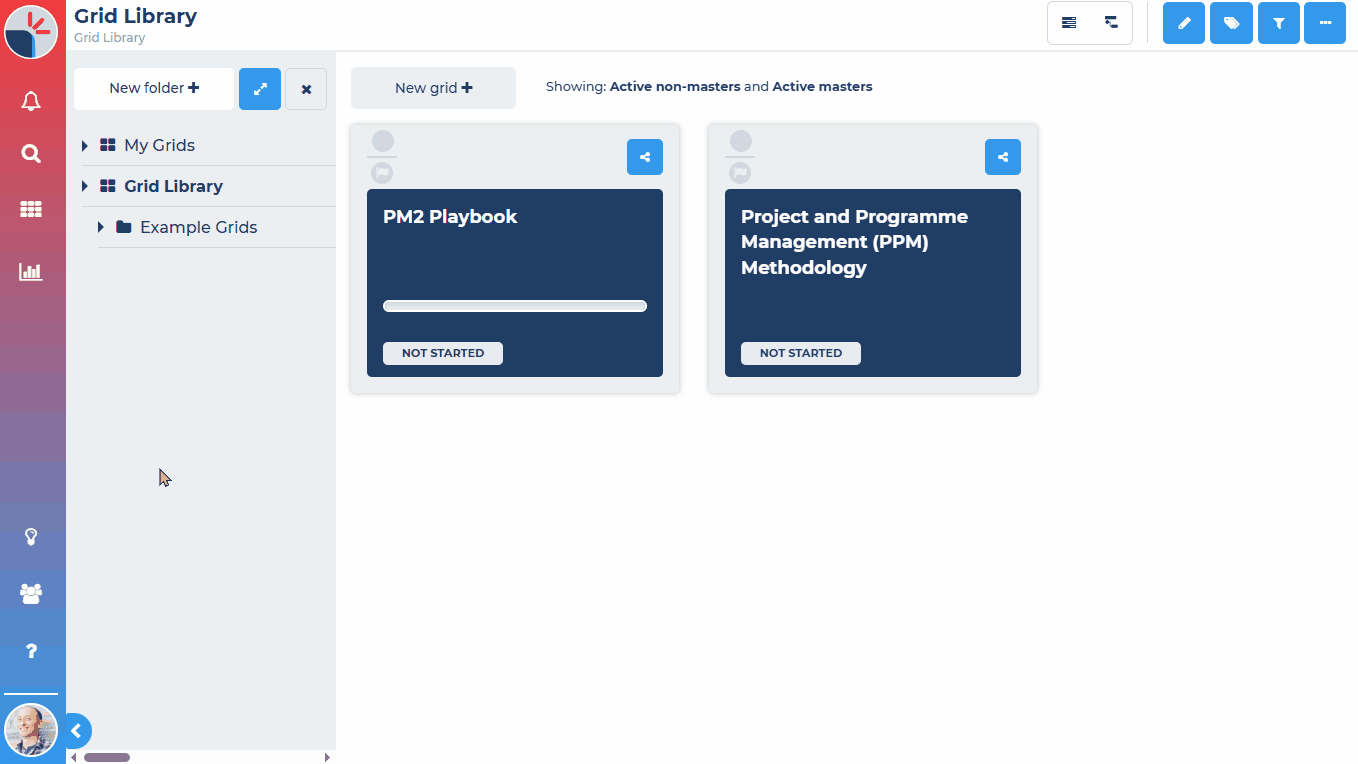
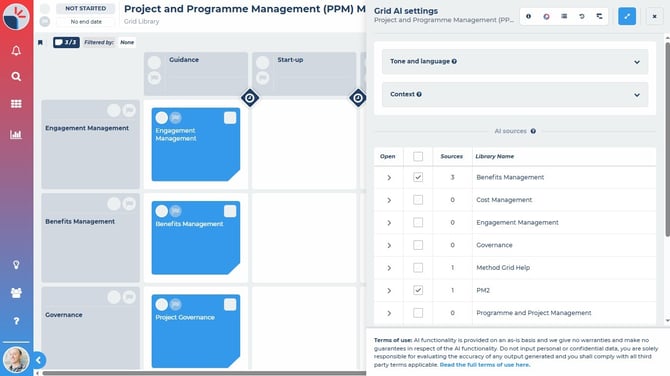
Once you have your knowledge sources organised into your source libraries, you can assign these libraries and the sources within them to your grids. Once a library has been assigned to a grid, the AI Assistant can use those sources when working with that grid.
Each of your grids now have their own AI settings. Open the AI settings and for each grid you can set the following:
- Tone and language = The tone and language the AI Assistant should use when responding in this grid e.g. Professional UK English. At least edit access to the grid is required to set and edit this.
- Context = The purpose of the grid, what it contains, who uses it etc. At least edit access to the grid is required to set and edit this.
- AI sources = The source libraries available to the AI Assistant in this grid. At least manage access to the grid is required to set and edit this.
Assigning AI Sources to Grids
In order to set which AI sources the grid can use, you must have at least manage access to the grid and at least view access to the source libraries you want to assign. To set the AI sources available to the grid:
- Open the grid and select AI settings
- Tick the AI source libraries you want to make available to the AI Assistant in this grid
- Close AI settings
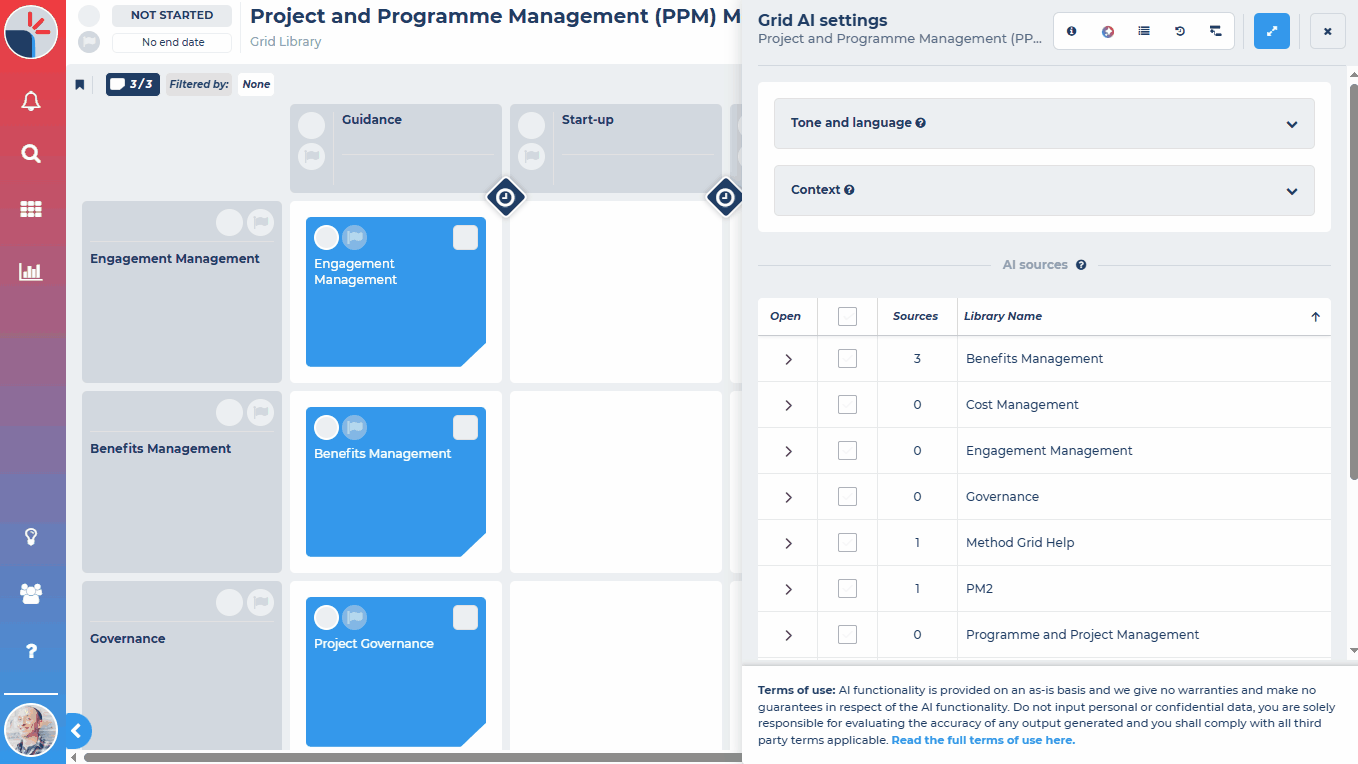
Once you have set which sources are available, the AI Assistant will have access to those sources when working in that grid. Members with edit access to the grid can then select sources from those available libraries to use when generating content in the grid, this is done in the element and stage gate AI settings.
Element and Stage Gate AI Settings
Once your grid has AI settings configured and AI source libraries assigned to it, these will be used by default when creating content in elements and stage gates.
Each of the elements and stage gates in your grids now have their own AI settings. By default, each will inherit the grid AI settings unless a member with edit access chooses to override these settings at the element or stage gate level. To view or override the grid AI settings:
- Open the element or stage gate
- Open the AI settings
- You can now view the AI settings currently in use
- If you want to override the grid AI settings, toggle the override switch to Yes
- You can now set specific AI settings by:
- Setting the tone and language
- Setting the context
- Selecting which specific AI sources to use (tick to select)
- Close AI settings and those settings will now be set for that element or stage gate
Note: the element and stage gate AI sources will only show the AI sources available to the grid, as set in the grid AI settings. This ensures members with manage access to the grid can control which AI sources are available for use.
Note: The tone, language and context settings of the grid are also used by the AI assistant chat in that grid.
Using AI Sources in Elements and Stage Gates
Now your grid, elements and stage gates have either their own or inherited AI settings, these will be used when generating content using the AI Assistant, either when using your AI assisted templates or when using the AI Assistant to tweak content.
AI Sources in AI Assisted Templates
When you build and element or stage gate using an AI assisted template, you can now first review the current AI settings and sources in place for that element or stage gate before selecting the template to start building content. Once you’ve reviewed this and selected the template to use, the AI Assistant will generate your content using you bespoke sources and settings.

AI Sources in the AI Assistant
When you use the AI Assistant to tweak or create content in element and stage gate content areas, it will also use the AI settings and sources in place for that element or stage gate. You can review and change these by clicking the link to to open the AI settings.
Note: not all Method Grid accounts and users have AI enabled. If you would like to enable AI for your account, please contact us.