How do I add/manage checklists/tasks?
Users with edit/manage access add and manage checklists/tasks.
To add checklists, you need first to have created a checklist area (see How do I add/manage content areas?).
Next, ensure you are in edit mode, by clicking the edit mode action button (pencil symbol) from within the action bar.
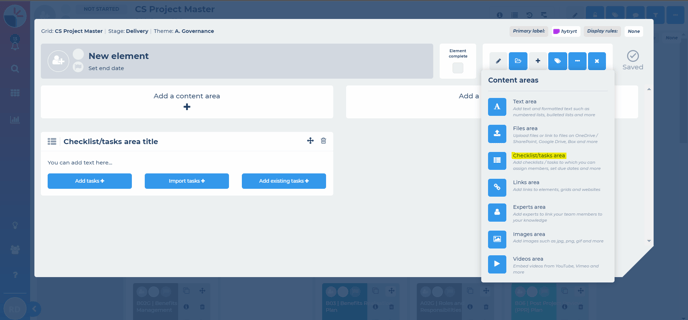
Within the item you are looking to edit, architects and builders can add a Checklist/tasks area (or multiple tasks areas) – by clicking on the “add content areas” action button and selecting “Checklist/tasks area”.

You can add tasks in multiple ways:
1) How do I add a new task to a checklist/tasks area?
2) How do I bulk upload/paste tasks into a checklist/task area e.g. copy from Excel?
Like all other content areas, they can then be placed (using the blue drag-drop action button) in any position.
Adding a checklist/tasks area will prompt a progress bar on your element as you create or import your tasks. The progression bar will progress as tasks are completed.